
|
Article |
07 of 75 |
|
Meta title |
Attic Rodent Cleanup: The Full Job, Start to Finish (51 chars) |
|
Meta description |
How pro crews run an attic rodent cleanup: inspection, exclusion timing, wet-down, insulation vacuuming, sanitizing and reinsulating in the right order. (152 chars) |
|
URL slug |
/blog/attic-rodent-cleanup/ |
|
Primary keyword |
attic rodent cleanup |
|
Secondary keywords |
rodent attic cleanup, cleaning attic after rodents, rodent contaminated insulation removal |
|
Money page this supports |
https://www.ramvacbags.com/Insulation-Vacuum-Bags |
|
Audience |
Wildlife and attic restoration |
|
Featured image |
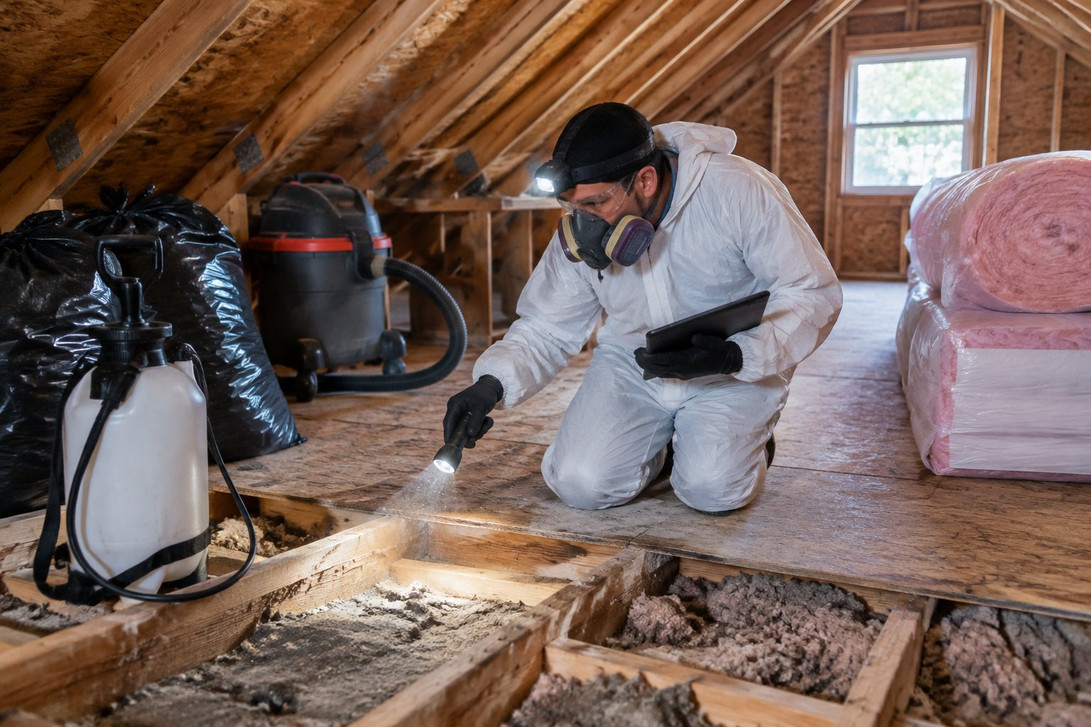
a technician in white disposable coveralls and a half-face respirator kneeling between joists in a stripped attic, hose leading back to the hatch. |
|
Client approval needed |
none |
|
Publishing note |
Remove this table before posting. Set the H1 below as the post title. |
Attic Rodent Cleanup: The Full Job, From Inspection to Reinsulation
The traps have gone quiet, the entry gap at the soffit is sealed, and the homeowner wants to know when the smell will go away. That's the moment a wildlife job turns into a restoration job, and it's where a lot of the money and most of the mess sit.
A proper attic rodent cleanup runs in a fixed order: inspect and scope, confirm the rodents are out, set up containment, wet down and pick up the loose waste, vacuum the contaminated insulation out, detail and disinfect the attic floor, then dry, verify and reinsulate. Skip a stage or shuffle the order and you either recontaminate your own work or leave the source of the odor under fresh insulation.
The inspection decides whether this is a spot job or a strip-out
Walk the attic before anything moves and photograph it: wide shots to show where activity concentrated, close-ups of nests, droppings, urine staining and chewing. Note tunnels through loose fill, matted or flattened runways along the top plates, dead rodents, gnawed wiring and torn duct jackets. Those photos sell the job, set the scope and protect you when the homeowner asks later why the whole attic came out.
The scope question is mostly about the insulation. The CDC's rodent cleanup guidance is direct on this: exposed insulation contaminated with urine and droppings goes into plastic bags for removal. In practice, one or two isolated nests in otherwise clean, dry batts can be a partial removal. Droppings spread through loose fill, urine odor across several bays or runways along every wall usually means taking everything out, because you can't clean waste that has worked down into the fibers.
Grade the contamination too. The CDC's updated hantavirus risk-reduction recommendations treat piles of feces, numerous nests or dead rodents as a heavy infestation, which calls for a higher level of protection (more on that below).
One more check before you quote: look at what the insulation actually is. Vermiculite (pebbly, gray-brown or gold, almost weightless) can contain asbestos. No insulation vacuum bag is HEPA rated, ours included, so stop, have it tested and refer it to a licensed abatement contractor if there's any doubt.
Cleanup waits until the last rodent is out
Cleaning an attic with live rodents in it means doing the job twice. Work with whoever is handling trapping and exclusion, and don't schedule removal until monitoring shows no fresh droppings, no new chewing and no trap activity. If fresh sign appears halfway through the job, stop and get the exclusion reviewed. Sealing entry points properly is its own discipline; for the cleanup crew, the only rule is that the attic has to be quiet before the first bag fills.
Set up so the house stays cleaner than you found it
Most callbacks on rodent jobs aren't about the attic. They're about dust on the hallway carpet. A good setup prevents that.
- Put the removal vacuum outside, in the driveway or on the trailer, and run the hose through the shortest clean route to the hatch.
- Protect the path: drop cloths or floor protection from the door to the hatch, and plastic sheeting around the hatch opening.
- Shut down the HVAC system if ducts or an air handler sit in the attic, so the system doesn't pull dust into the living space.
- Stage empty bags on a tarp where full ones can be closed and set aside without being dragged.
- Ventilate before entry. The CDC recommends opening the space up for 30 minutes before cleaning starts.
Dress for the grade of job. A heavy infestation means full protection: disposable coveralls, boot covers, gloves, goggles and a fitted half-face respirator with 100-series filters (or a powered air-purifying unit), and a clean-shaven seal. Our Microvek microporous coveralls are built for contaminated attics and act as a barrier against hazardous dusts and light splash. Swap to a fresh suit every time you leave the containment, and put the used one in with the job waste.
Wet down droppings and nests before anything moves
Loose droppings, nests and dead rodents come out by hand, wet, before the vacuum goes near the insulation. The CDC is clear that rodent urine, droppings and nesting material should never be swept or vacuumed dry.
Soak each pile, nest and carcass with disinfectant or a freshly mixed bleach solution, give it the full contact time, then lift it with paper towels. Carcasses and nests are double-bagged. Work one section at a time so nothing dries out before you reach it, and re-spray as you go. The exact CDC mix and soak time are in its cleanup guidance linked above.
Vacuum the insulation out in a set order
With the visible waste off the surface, the contaminated insulation comes out. This is the stage where equipment and habits decide whether the job takes one day or three.
- Pull batts first. Fold contaminated batts in on themselves so the dirty face is inside, and stuff them straight into a bag. On mixed attics, get the batts out before vacuuming the loose fill.
- Start at the far end. Work from the farthest point back toward the hatch so you never crawl over cleared joists dragging hose through dirty material.
- Run hose between the machine and the bag. Never clamp a bag directly onto a high-horsepower outlet. That length of hose takes the sting out of nails, staples and wood chips, so they've slowed down before they reach the fabric.
- Fill to about 85 percent. On a 75 cubic foot bag that's roughly 63 usable cubic feet, and it leaves enough fabric to close the bag without puffing dust out of the spout. Insulation soaked with urine is heavier than it looks, so fill those bags lighter still.
- Change bags as soon as they go drum-tight. A clogged bag loses suction at the attic end and strains its seams.
- Close and stage every bag before it moves. Lift full bags rather than dragging them, and keep them outside the living space.
Bag choice matters more on a rodent job than on a clean retrofit. Contaminated attics call for low-dust non-woven fabric, so most crews run our PRO-400 Extra Heavy Duty or the PRO-450 Super Duty bag, rated to 450 pounds with the best filtration we make, for heavy, damp loads. Woven Flex-Bags move a lot of air but aren't low dust, so they're the wrong pick for cellulose from a contaminated attic. Every bag in our insulation vacuum bag range fits standard removal vacuums and hoses up to 10 inches.
If you're running the job in-house rather than renting, a machine that can handle damp, packed material makes a real difference on urine-soaked cellulose. Our RAMVAC removal vacuums are built for that work, from the 23 HP gas unit to the 40 HP diesel. Call 404-354-6268 for a quote.
Detail the attic floor once the insulation is gone
Stripping the insulation exposes everything the rodents left underneath: droppings packed into the corners of joist bays, nests against the top plates, urine staining on the drywall paper and framing. Pick these up the same way as before, wet and by hand, then disinfect the exposed joists, top plates and deck surfaces according to the product label. Keep liquids away from live wiring and junction boxes.
This is also the best look anyone will get at the attic for years. Photograph chewed wiring and refer it to an electrician, note damaged duct runs for the HVAC contractor, and flag any roof leaks or wet sheathing. Nothing on that list should disappear under new insulation.
Dry, verify, then reinsulate
Let every treated surface dry completely before the attic is closed up. Then do a final walkthrough against your opening photos: waste removed, surfaces treated and dry, damage documented, entry points still sealed and no fresh sign of activity. Leave monitoring in place if the pest control side of the job allows it.
Only then does new insulation go in, to whatever depth the project specifies. Before-and-after photos of the bare, clean deck are worth taking even if the homeowner never asks; they close out the job cleanly and they're the best marketing a restoration crew has.
Stock up before the next rodent job
Running out of bags mid-attic is the most avoidable delay on any cleanup. Plug the attic's length, width, insulation depth, material and condition into our free bag calculator for a per-model count, then add 10 to 15 percent, more again for packed or wet material. Every US order ships free the same day. For help choosing bags, coveralls or a RAMVAC for your crew, 404-354-6268 is answered 24/7 by people who know these jobs.
Frequently Asked Questions
Is fogging or spraying the attic enough instead of removing the insulation?
No. Fogging can treat surfaces, but it doesn't remove droppings, nests and urine that have worked down into the insulation, and those are what keep the odor going. The CDC's advice is to bag and remove that insulation, then disinfect the surfaces it was hiding.
Should the HVAC system be turned off during cleanup?
Yes, whenever ductwork, returns or the air handler run through the attic. A running system can pull dust through gaps in duct connections and spread it through the house. Turn it off before work starts and back on only after the attic is clean and the bags are out of the building.
How do you decontaminate the vacuum hose between jobs?
At the end of the job, wipe the outside of the hose and machine with disinfectant, and run the machine briefly with a fresh bag fitted to clear residue from the hose interior. Store contaminated hoses separately from clean gear on the truck so nothing transfers to the next home.
How should the filled bags be disposed of?
Disposal rules for contaminated insulation vary by town and county, so check with your local waste authority or landfill before the job. Keep every bag closed and sealed in transit. Dead rodents and nesting material should already be double-bagged, as the CDC recommends.
Which RAM bag works best for rodent jobs?
For most contaminated attics, a low-dust non-woven bag: the PRO-400 for dry fiberglass and cellulose, or the PRO-450 when the material is damp, packed or heavy with urine. For large strip-outs, trailer and dumpster bags let the vacuum fill one big bag in place so nobody carries full bags through the house.